Learn the basic concepts of game development and create your own Snake clone by following this step-by-step tutorial.

Table of Contents
Preface
Would you like to be able to create an immersive world from scratch and let other people explore it? It’s truly a magical power and I wanted to acquire this power since my early childhood. In fact, that’s why I chose to study computer science.
Game development is one of the most fulfilling things I experienced in my life. Games have no pre-existing rules or limits, the only limit is your own imagination. You’re free to create whole worlds from scratch and they’ll look and behave exactly as you want them to. It gives you a powerful way to express your ideas and share them with other people.
I’m not a professional game developer. Why? It turned out there are many other useful things computers can do and, unfortunately, making video games isn’t a dream job. I’ve made a lot of games during my student years and it helped me to land my first programming job but making games is just one of my hobbies now. This means I’m not the best person to give anyone advice on how to become a professional game developer. This guide is aimed at hobbyists, like myself, who just want to learn the basic concepts of game development using Kotlin.
Art Form or Entertainment?
In my opinion, game development is a form of art. Games can tell you an interesting story, just like a good book does, but you can actually see this story exactly as the author wanted you to see it. Movies are better at visuals but they’re linear so you can only be an observer who have no influence on what’s happening. It can be a good thing, but it’s limiting. Also, the movies have a fixed pace and it’s one of the reasons why some books are much better than movies despite the lack of visuals: movies are often artificially shortened to fit the movie theater standards or artificially extended to show you more ads.
Common Issues
The most common issue that an indie game developer might face is the lack of motivation to finish a game. Here are several tips on how to stay motivated:
It’s Not About Tools
It’s impossible to master everything, learning every aspect of game development can take years but it’s not necessary to start writing games as a hobby. Many beginners try to use low-level libraries such as OpenGL, DirectX or Vulkan in their first games. That’s what a professional game developer should know how to use but in most of the cases the Canvas API would be a better choice since it’s much simpler to use. You can save a lot of time and nerves if you select the right tools.
Time is an Important Factor
A lot of people try to write their own MMORPG or think they can match the top games in the industry in terms of the features. Let’s make it clear: even if you have the required skills and motivation, no one can make such a game in reasonable time. It takes hundreds of people and a few years, sometimes more than a decade to produce a typical AAA game. As an indie game developer or a small team, you don’t have a lot of time and resources but there are advantages in being small that you can utilize. Although it’s nearly impossible for you to create a giant game world and tons of beautiful graphics, you are able to experiment more with a gameplay. Big companies are too worried for their sales and it limits their ability to experiment with a gameplay. If you have no investors to please, that actually gives you a big advantage.
Make it Look Good Enough
Graphics is an important part of modern games. It’s cool if you can write a clean and beautiful code but players won’t see it. If your game looks bad it can discourage the players and even the authors themselves. It’s much more fun to work on something that looks nice and clean. A typical indie game doesn’t require a lot of graphics but graphics is very important to keep you motivated and make your game more enjoyable.
Engine
We won’t use any specific game engine, it’s more fun to create a game engine from scratch and it will also help us to better understand how video games work under the hood. We’re going to create a Snake game clone because it’s relatively easy to implement which makes it a good game to start with.
Source Code
You can check the full source code here. It may help you to understand project confuguration and see the end result that you should expect if you’ll follow this tutorial.
Creating a Scene
Every game is different but, luckily for us, many video games share a common set of components and patterns. There are things that may be specific to a certain genre but on a high enough level all games are more or less the same and they all made of the same components.
Some of those components are:
-
Screen- player has to be able to see what’s going on in the game and using a screen is a convenient way to provide visual feedback. It can be a TV screen, computer screen, mobile screen or even a VR headset. Technically, there are two screens in a VR headset but we don’t have to worry about that, most of the required adjustments are handled automatically by the headset hardware. -
Controller- it’s the device that can be used to interact with video games. Many devices can be used as controllers: keyboards, computer mice, joysticks and a variety of more exotic devices such as steering wheels or fighter jet controllers. -
Game Objects- anything that exists in a game is a game object. Some objects are static, such as the walls, and some are more dynamic, such as the player’s game character or his friends and enemies.
Scene Class
Let’s start with implementing a screen component. A typical desktop app consists of several windows and every window has its own purpose and separating concerns is usually beneficial for the app users and the developers alike. App users may have a better focus and feel less overwhelmed since there is a separate window for each specific task and the developers can split the application logic between those screens which makes it easier to maintain the code base.
Video games don’t have a window system by default, but it doesn’t mean we can’t implement it. I think we shouldn’t use the name ‘window’ when we’re making a game. “Level” seems to be a good name, many games do look like a series of levels but, in my opinion, this name is not abstract enough. For instance, a main menu or a settings screen are visually separated from the rest of the game and it’s confusing to treat them as “levels” but they also have a lot in common with the rest of the screens: they usually display something and process the input events from the game controllers. So let’s call it a scene, it will be easier to understand that any kind of action can happen here as long as it has something to show to the player. Obviously, we don’t want the player to stare at an empty scene, it’s no fun at all.
Here is our Scene class:
import java.awt.Graphics2D
import java.util.concurrent.TimeUnit

abstract class Scene(val game: Game) {

    abstract fun update(
        timePassed: Long,
        timeUnits: TimeUnit = TimeUnit.NANOSECONDS
    )

    abstract fun draw(graphics: Graphics2D)
}
How Does It Work?
The update method is supposed to be called each time we want the scene to update it’s state but, in order to perform the update, the scene needs to know how much time has passed since the last call. That’s why we require the caller to provide us with the timePassed value. For instance if we have a moving car on the scene there is no way to tell how far it should move unless we know both its speed and the amount of time that has passed since the last update. The update and draw methods should be called at least 30 times per second to make sure that all the game objects will move smoothly. That’s why if you try to launch a resource intensive game on the old hardware it would look like a slide show. Some computers might be unable to update and draw the game scenes fast enough to make the game look “realtime”.
The only purpose of the update method is to sync “game time” with “real time”. We don’t care what a particular game does with this information, we just need to tell the game how much time has passed since the last call.
Updating game state is important, but we still need a way to display it in order to make it visible to a player. That’s why we have introduced the draw method, and it supposed to be called immediately after update.
Conclusion
Now we have our way to separate our games into a set of scenes, but it’s only one of the core game components we need. Next, we’re going to make a component which will handle the data from the input devices. It’s fun to see the objects move but it’s even more fun to be able to control them.
Handling Input Events
Controllers are devices that can register players’ actions, and we want our players to be able to alter the course of a game. In more technical terms it means that every game has a state and the game controllers are devices that can be used to change that state.
There are lots of different input devices: typical console games tend to rely on game-pads, flight or racing simulators can support their own unique controllers, but we’re writing a PC game, so we’ll stick with the keyboard: the most popular input device used to interact with personal computers.
It makes sense to also support the computer mouse and trackpad, but we don’t really need those devices to control a snake, so we can do it later. It will also make the code a bit more simple, and it’s always better not to add any unnecessary complexity.
Input Class
Let’s add a new class and call it Input
import java.awt.event.KeyEvent
import java.awt.event.KeyListener

class Input : KeyListener {
    private val events = mutableListOf<Event>()

    override fun keyTyped(event: KeyEvent) {
        // We're not interested in this kind of events
    }

    override fun keyPressed(event: KeyEvent) {
        synchronized(this) {
            events += Event.KeyPressed(event)
        }
    }

    override fun keyReleased(event: KeyEvent) {
        synchronized(this) {
            events += Event.KeyReleased(event)
        }
    }

    fun consumeEvents(): List<Event> {
        synchronized(this) {
            val consumedEvents = events.toList()
            events.clear()
            return consumedEvents
        }
    }

    sealed class Event {
        data class KeyPressed(val data: KeyEvent) : Event()
        data class KeyReleased(val data: KeyEvent) : Event()
    }
}
How Does It Work?
Let’s take a closer look at our Input class. It implements the KeyListener interface which allows it to be notified of any keyboard events that happen inside the game window.
There are 3 methods we have to listen to in order to implement the KeyListener interface:
keyTyped- we don’t need those events, so we will ignore themkeyPressed- this method is being called each time our player presses a button on a keyboard. We want to know about that because we need to save this event for later processingkeyReleased- the player released a button, it can be valuable, so we need to save it too. Sometimes we want to do something while a certain button is pressed, so we need to know when to start as well as when to stop such actions (think of a gas pedal or something like that)
Note that we just store those events for later use, so we expect some other component to actually react to them. I’ve called it event consumption because once the external component reads the available events - they are gone. It’s more straightforward because it helps us to avoid processing the same event twice because it will never return twice, but it also assumes that we have a single consumer, otherwise such a model wouldn’t work in a predictable way.
Why Synchronize?
Probably you’ve noticed that all the code that touches the event collection is placed inside the synchronized blocks. The reason is that our game loop is using its own thread but our game window is a part of the Swing library which uses a different thread so we have to be extra cautious about that. Concurrent modification of a collection is a thing we would like to avoid since it will crash our game from time to time or introduce a lot of weird and hard to trace side effects.
So what exactly are the synchronized blocks used for? They guarantee that the code inside them will never be used by more than one thread at the same time. We can also use this keyword for several methods inside a class and that would guarantee that only one thread can access any of those methods at any given moment. This of course leads to some performance drawbacks, but it will guarantee that our class will work properly in a concurrent environment, and we can actually use more advanced synchronization techniques, but we won’t be using them in this tutorial to keep the code as simple as possible.
Conclusion
Now we have the Scene and the Input classes done. In the next piece we’ll create the key element of our mini engine - the Game class. It will utilize and tie together the code we had created earlier.
Game Loop
Every game has a game loop. It is a simple loop that should be familiar to every programmer. We can think of a game as a sequence of static images changing fast enough to create an illusion of motion. The purpose of the game loop is to keep generating new frames as long as the loop lasts and, as with any loop, it shouldn’t last forever, so we must have some way of breaking that loop, usually when a player decides to quit the game.
Implementation
We’re going to create a class called Game which will wrap the game loop, and it will also contain all the crucial game components such as an input handling module and the current scene.
This class will have two methods:
play- this method will activate the game loop, so it can start producing new frames.pause- this method will move the game to the inactive state. The game loop should be stopped which means the game should stop producing new frames.
Here is the code:
import kotlinx.coroutines.*
import kotlinx.coroutines.swing.Swing
import java.awt.Canvas
import java.awt.Dimension
import java.awt.Graphics2D

class Game(val screenSize: Dimension) : Canvas() {
    var scene: Scene? = null

    val input = Input()

    private var gameLoop: Job? = null

    init {
        size = screenSize
        addKeyListener(input)
    }

    fun play() {
        if (gameLoop != null) return

        gameLoop = GlobalScope.launch {
            var lastIterationTime = System.nanoTime()

            while (isActive) {
                val scene = scene ?: continue
                val now = System.nanoTime()
                val timePassed = now - lastIterationTime
                lastIterationTime = now

                scene.update(timePassed)

                withContext(Dispatchers.Swing) {
                    scene.draw(bufferStrategy.drawGraphics as Graphics2D)
                    bufferStrategy.show()
                }
            }
        }
    }

    fun pause() = runBlocking {
        gameLoop?.cancel()
        gameLoop?.join()
        gameLoop = null
    }
}
How Does It Work?
As you can see, the Game class extends the Canvas which is the part of the AWT (Abstract Window Toolkit) library. We can think of the Canvas as the empty drawing space that we’ll be using to draw our game scenes on and because our Game class is also a Canvas we can easily place it inside any AWT window.
The Game constructor takes a single parameter: screenSize, it should state how much space (in pixels) our game wants to occupy. The Game class also has references to the current scene, the input module and the game loop. The play and pause methods are used to control the game lifecycle.
The most interesting part of this class is the content of the game loop, so let’s examine it in more detail:
gameLoop = GlobalScope.launch {
    var lastIterationTime = System.nanoTime()

    while (isActive) {
        val scene = scene ?: continue
        val now = System.nanoTime()
        val timePassed = now - lastIterationTime
        lastIterationTime = now

        scene.update(timePassed)

        withContext(Dispatchers.Swing) {
            scene.draw(bufferStrategy.drawGraphics as Graphics2D)
            bufferStrategy.show()
        }
    }
}
Before we go into the while loop, we have to initialize the variable called lastIterationTime. This variable holds the time of the previous iteration, and we need to know it in order to find out how much time has passed since the last frame was rendered.
The loop itself will run until the enclosing coroutine is active. Calling the pause method will make this coroutine inactive, so it will stop the loop so the code inside it will stop repeating.
In The Loop
The first thing that the loop does is calculating how much time has passed since the last iteration, and it can vary from computer to computer. The timePassed value will be larger on slower PCs and lower on the fastest ones. Obviously, the lower, the better but players would hardly notice any difference if the game loop can do at least 30 iterations per second. It would even make sense to cap the maximum amount of frames at 60 per second to make sure we’re not wasting more processing power than we actually need to make sure the game runs smoothly.
Now that we know how much time has passed since the previous iteration, we can call the update and draw methods to update the game state and draw that state on the screen. We can also obtain a Graphics2D object from our Canvas which can be used by our scenes to perform various drawing operations.
And the last step our loop is supposed to do is to call the BufferStrategy.show method to notify other UI components that the frame is ready to be displayed.
Conclusion
Now we have the game loop, the input module and the Scene class to display our frames. It’s all tied together and managed by the Game class. The only thing our little framework is missing is an actual window. The game needs to live inside a window and that’s what we’re going to implement next.
Game Factory
We already have a set of components for controlling the game loop, drawing on a screen and processing the input events so why do we need something else? There are two key things that are still missing:
- We need a place to instantiate our game
- Our game needs a window so we have to provide it
Let’s add the GameFactory class which will do those tasks for us:
import java.awt.Dimension
import javax.swing.WindowConstants
import java.awt.BorderLayout
import javax.swing.JFrame

object GameFactory {

    fun create(
        screenSize: Dimension,
        windowTitle: String
    ): Game {
        val game = Game(screenSize)

        JFrame().apply {
            title = windowTitle
            isVisible = true

            layout = BorderLayout()
            add(game)
            pack()

            defaultCloseOperation = WindowConstants.EXIT_ON_CLOSE
            setLocationRelativeTo(null)
        }

        game.createBufferStrategy(2)
        game.requestFocus()
        return game
    }
}
How Does It Work?
This class takes the screen size and window title as arguments. Both of them can vary from game to game, so we shouldn’t hard-code it in order to make this factory reusable.
Our game can’t appear on the screen if there is no window to host it. The code above uses a JFrame to create the game window. We should also make sure that the game is visible and that the window is not resizable by default. The only line that seems a bit odd is setLocationRelativeTo(null) and it simply means that we want our game window to be placed right in the center of a computer screen.
The last step is to create a buffer strategy and request the input focus so our game can receive the input events from a keyboard.
Launching a Game
Let’s create a new file and call it Main.kt which will serve as an entry point to our game. Here is the code:
import java.awt.Dimension

fun main() {
    val game = GameFactory.create(
        screenSize = Dimension(660, 660),
        windowTitle = "Snake"
    )

    game.play()
}
Now we can launch our game engine and see if it works so feel free to do it. You should see the empty white window in the center of your screen.
Conclusion
Our “game engine” is up and running and that means we can start using it. Our next goal is to create a simple scene to demonstrate how to draw on the screen and handle user input.
Main Menu
Most of the games have a main menu because we might not always know what the player want to do when he or she launches a game. The player might want to start a new game, load the saved game data or modify the game settings but we will have a very simple menu in the Snake game which will have only one option: start a new game.
The main menu is just a Scene so it already has the ability to draw on the screen and it can also handle user input. Let’s see the whole code first:
import java.awt.Color
import java.awt.Font
import java.awt.Graphics2D
import java.awt.event.KeyEvent
import java.util.concurrent.TimeUnit

class MainMenuScene(game: Game) : Scene(game) {
    private val primaryFont = Font("Default", Font.BOLD, 30)
    private val secondaryFont = Font("Default", Font.PLAIN, 20)

    override fun update(timePassed: Long, timeUnits: TimeUnit) {
        game.input.consumeEvents().forEach {
            if (it is Input.Event.KeyPressed && it.data.keyCode == KeyEvent.VK_ENTER) {
                game.scene = GameScene(game)
            }
        }
    }

    override fun draw(graphics: Graphics2D) {
        graphics.apply {
            color = Color.black
            fillRect(0, 0, game.screenSize.width, game.screenSize.height)

            font = primaryFont
            color = Color.white
            val name = "Snake"

            drawString(
                name,
                game.screenSize.width / 2 - fontMetrics.stringWidth(name) / 2,
                game.screenSize.height / 2 - 50
            )

            font = secondaryFont
            color = Color.gray
            val message = "Press Enter to continue"

            drawString(
                message,
                game.screenSize.width / 2 - fontMetrics.stringWidth(message) / 2,
                game.screenSize.height / 2 + 50
            )
        }
    }
}
Properties
Let’s examine all the properties that are declared in this class:
private val primaryFont = Font("Default", Font.BOLD, 30)
private val secondaryFont = Font("Default", Font.PLAIN, 20)
Both of those properties have the same type: Font. We could have declared them in the draw method because it’s the only method that uses them, but we have to keep in mind that the draw method is usually called multiple times per second, so it’s extremely wasteful to initialize complex objects each time this method is called.
Update
override fun update(timePassed: Long, timeUnits: TimeUnit) {
    game.input.consumeEvents().forEach {
        if (it is Input.Event.KeyPressed && it.data.keyCode == KeyEvent.VK_ENTER) {
            game.scene = GameScene(game)
        }
    }
}
This method is quite straightforward because the only thing we have to do is to scan through all the keys that were pressed and check if any of them is the enter key. In case the enter key was pressed we should switch to the next screen. You can create an empty scene and call it GameScene to avoid compilation errors.
Draw
Let’s take a look at the draw method:
override fun draw(graphics: Graphics2D) {
    graphics.apply {
        color = Color.black
        fillRect(0, 0, game.screenSize.width, game.screenSize.height)

        font = primaryFont
        color = Color.white
        val name = "Snake"

        drawString(
            name,
            game.screenSize.width / 2 - fontMetrics.stringWidth(name) / 2,
            game.screenSize.height / 2 - 50
        )

        font = secondaryFont
        color = Color.gray
        val message = "Press Enter to continue"

        drawString(
            message,
            game.screenSize.width / 2 - fontMetrics.stringWidth(message) / 2,
            game.screenSize.height / 2 + 50
        )
    }
}
The first line sets the color to Color.black which means whatever we’re going to draw next, it will have the black color. It does not apply to the images of course, but it will affect the color of the geometrical primitives as well as fonts.
The second line just fills the screen with the previously specified color.
The next two blocks are more involved, but they just repeat the same pattern twice:
- Set font
- Set color
- Draw text
We use different fonts for the game title and for the hint message, but we just repeat the same steps, the only difference is in the values.
Testing
Let’s check this scene to see if it works. Now we can assign it to our Game instance in the Main.kt:
package com.bubelov.snake

import com.bubelov.snake.engine.GameFactory
import com.bubelov.snake.scene.MainMenuScene
import java.awt.Dimension

fun main(args: Array<String>) {
    val screenSize = Dimension(660, 660)
    val game = GameFactory.create(screenSize)
    game.scene = MainMenuScene(game)
    game.play()
}
Now let’s launch our game. You should see the following screen:
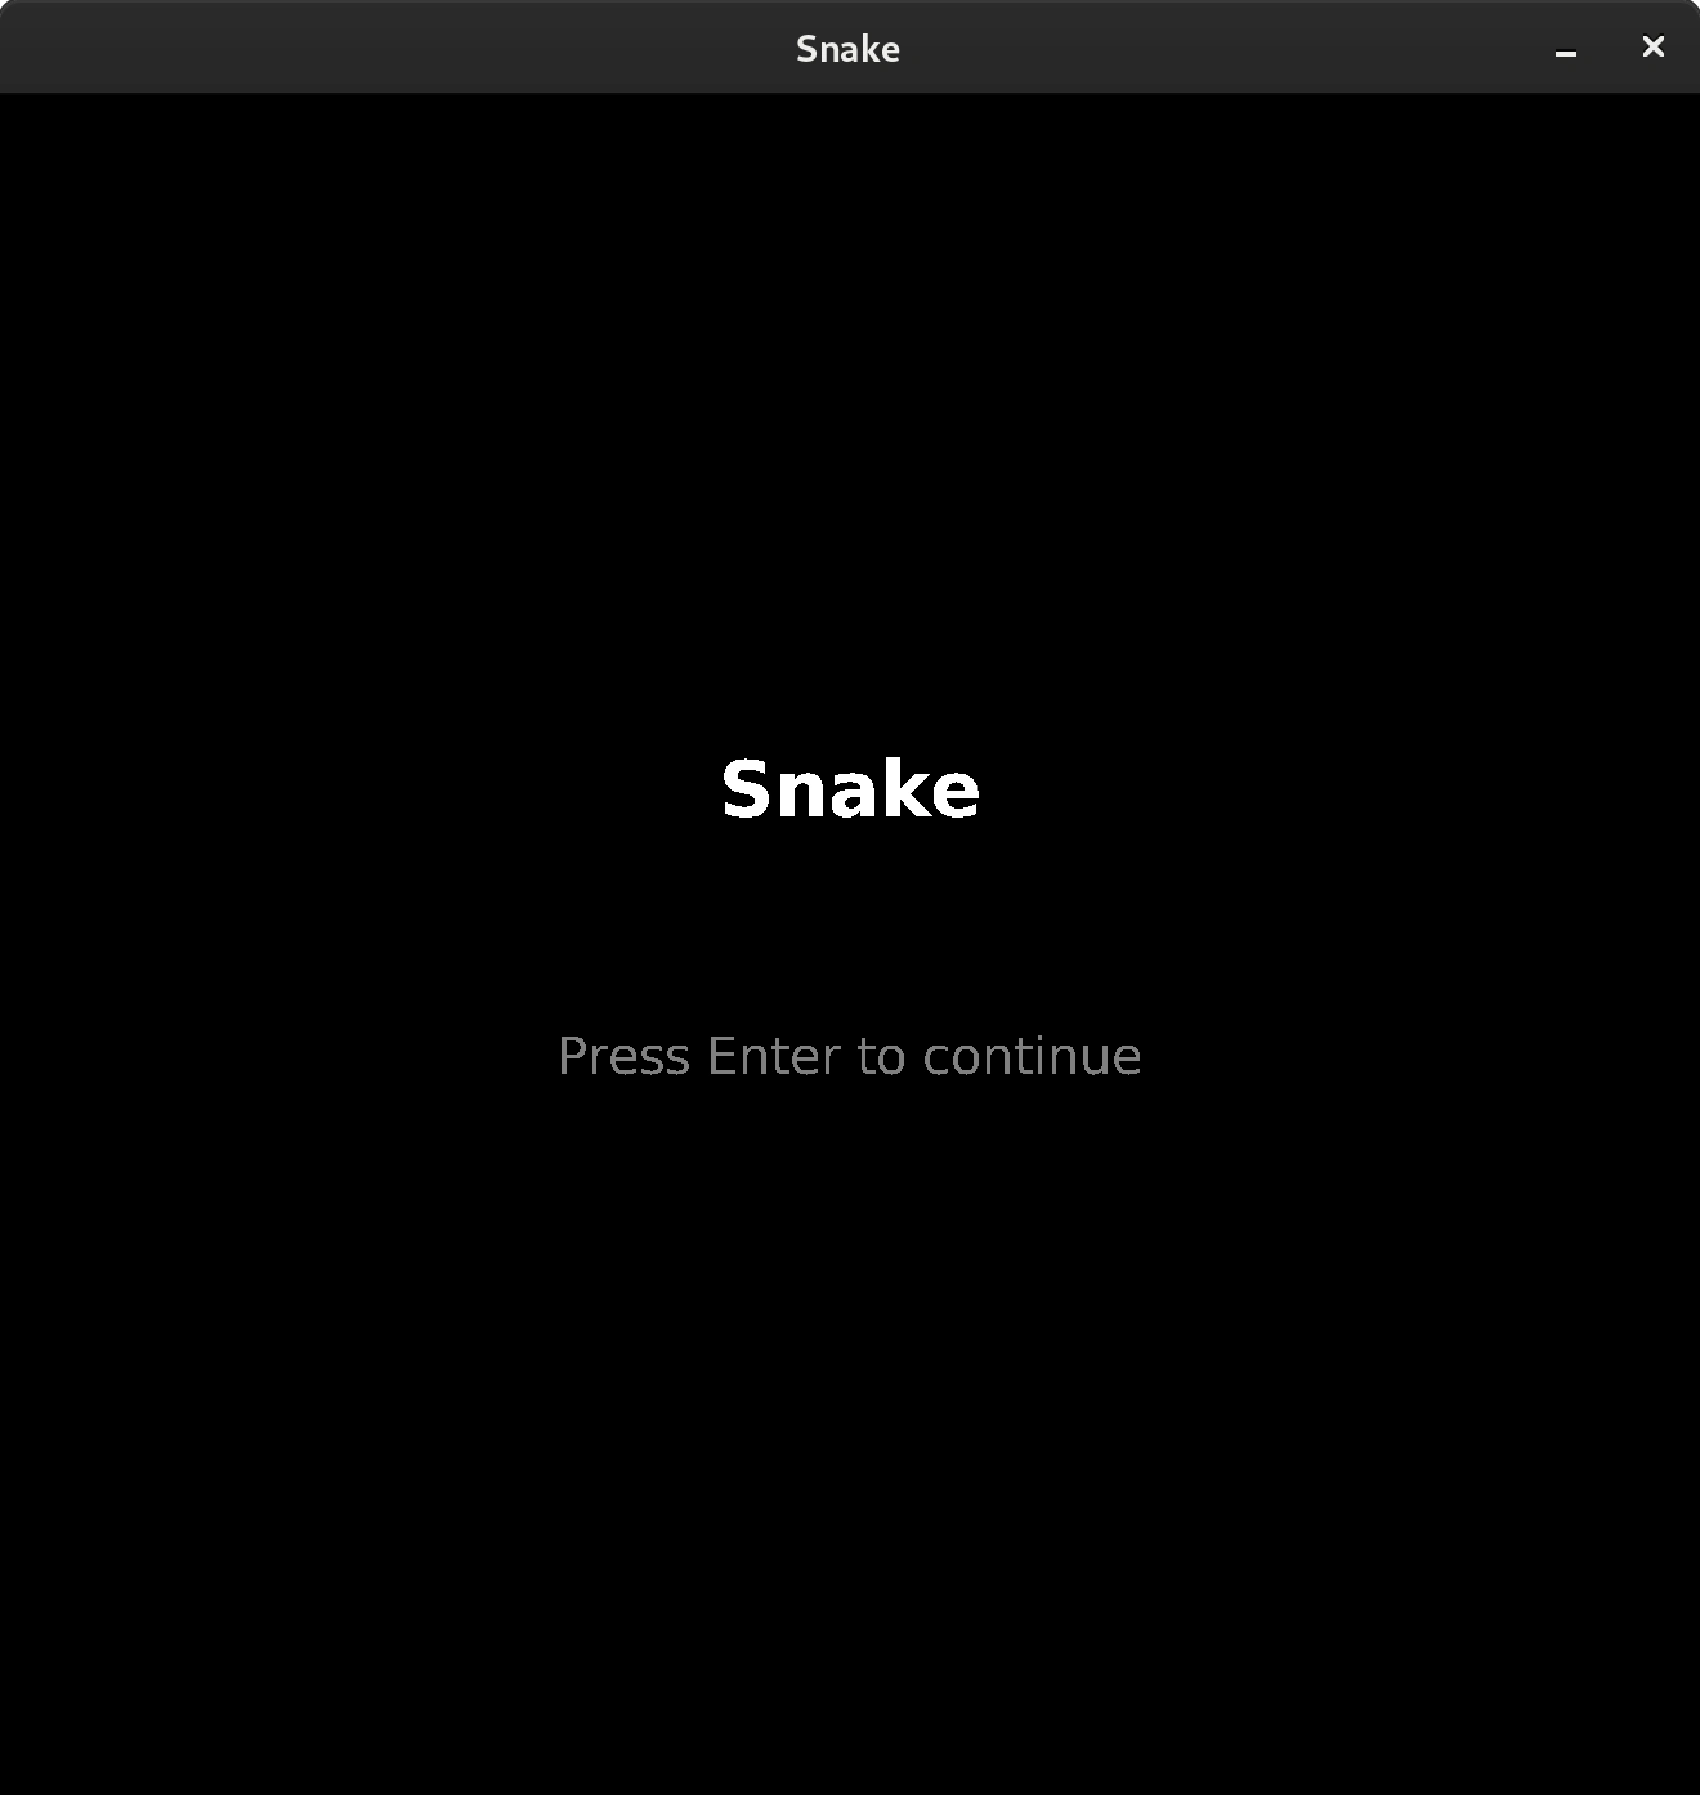
Conclusion
Now we know the basics of creating the scenes, and we also have the game menu. Next, we’re going to define the game model.
Model
We need a model layer to define what objects will exist within our game. We can define any object but since we’re working on the snake game, it makes sense to start with the essentials: snake and apple. Feel free to add more objects such as bonuses if you think it would make the game more interesting.
Snake Model
How can we represent a snake? As you may already know the traditional snake looked like a chain of blocks that constantly moves in a specific direction. Each part of the snake has its own position and this position changes when the snake moves.
Let’s create a new class and call it SnakeBodyPart:
data class SnakeBodyPart (
    var x: Int,
    var y: Int
)
This class represents one piece of the snake. Usually the snake is quite short when the game starts, but it grows longer as it eats apples. Each apple consumed by our snake adds one more part to it’s body. The only thing we want to know about each body part is it’s position.
Do we need something else except the list of body parts to describe the snake? It turns out the snake is a bit smarter than the sum of it’s parts. At least, it should have a direction, and it should be able to move according to the selected direction.
Let’s create a Snake class that will coordinate the movement of all the body parts:
class Snake(
    startX: Int,
    startY: Int,
    var direction: Direction = Direction.RIGHT
) {
    val body = mutableListOf<SnakeBodyPart>()
    val head by lazy { body[0] }

    init {
        body += SnakeBodyPart(startX, startY)

        body += SnakeBodyPart(
            x = startX - direction.deltaX(),
            y = startY - direction.deltaY()
        )

        body += SnakeBodyPart(
            x = startX - direction.deltaX() * 2,
            y = startY - direction.deltaY() * 2
        )
    }

    fun move() {
        for (i in body.size - 1 downTo 1) {
            val current = body[i]
            val (x, y) = body[i - 1]
            current.x = x
            current.y = y
        }

        head.x = head.x + direction.deltaX()
        head.y = head.y + direction.deltaY()
    }
}
This class handles the creation of the snake at the specific location as well as moving it in any specific direction. The only missing part is the Direction enum:
enum class Direction {
    UP,
    RIGHT,
    DOWN,
    LEFT;

    fun deltaX(): Int {
        return when (this) {
            LEFT -> -1
            RIGHT -> 1
            else -> 0
        }
    }

    fun deltaY(): Int {
        return when (this) {
            UP -> 1;
            DOWN -> -1;
            else -> 0;
        }
    }
}
Note that we have 2 helper methods to calculate how a particular direction affects x and y coordinates of the snake. For instance, the UP direction will produce deltaY = -1 and deltaX = 0.
Apple Model
The apple model is very simple. The only thing we need to know is the position of an apple which can be described as a pair of integers (x and y):
data class Apple (
    val x: Int,
    val y: Int
)
Conclusion
Now we have a model which describes all objects that can exist in our game’s world. Next, we will place those objects on the game screen and make them interact with the player and with each other.
Game Scene
Now that we have all the required components we can start working on the actual game mechanics. In this post we’re going to create the GameScene class, the main scene where most of the action happens.
Movement
Let’s think about snake movement. When should it move? We need some real numbers. The easiest way to move the snake is to call it’s move method on every scene update. It might seem like a good idea but let’s think about how many times that method is supposed to be called? The answer is: we don’t know, and we can’t know, most likely it will be called too often. Not only does it depend on a particular machine, it also can be called hundreds of times per second which will move the snake too fast making our game unplayable.
Our game world is just a grid of squares, so a square seems to be a great distance unit. How can we describe the speed? Distance units per second sounds reasonable so let’s specify our requirements:
The snake needs to move at a fixed pace of 1 square per 300 milliseconds, roughly 3 squares per second. The speed can be increased as the game progresses, feel free to play with this parameter.
How can we achieve such a behavior? I suggest we make an assumption that the scene will be updated faster than 3 times per second, so we need to move the snake on some updates but keep it still during other invocations of that same method.
Basically, we need a timer. Let’s add a new class and name it Timer:
class Timer(private val duration: Long) {
    private var remainingTime = duration

    fun update(timePassed: Long) {
        remainingTime -= timePassed
    }

    fun timeIsUp() = remainingTime <= 0

    fun reset() {
        remainingTime = duration
    }
}
This class also has an update method, just like our scene, but it only holds the remaining time until it should be fired so we can keep updating it, but it will not be fired until the time comes. In case the time is up we should perform our delayed event and reset the timer (if we want it to be repeating).
Game Scene
It looks like now we have everything to implement the game scene, let’s add a new class and call it GameScene:
import java.awt.Color
import java.awt.Graphics2D
import java.awt.event.KeyEvent
import java.util.concurrent.TimeUnit

class GameScene(game: Game) : Scene(game) {

    private val snake = Snake(
        startX = WORLD_WIDTH / 2,
        startY = WORLD_HEIGHT / 2
    )

    private lateinit var apple: Apple

    private val snakeMoveTimer = Timer(TimeUnit.MILLISECONDS.toNanos(300))

    init {
        placeApple()
    }

    override fun update(timePassed: Long, timeUnits: TimeUnit) {
        if (gameIsOver()) {
            // game.scene = GameOverScene(game) TODO Implement later
            return
        }

        processInput()

        snakeMoveTimer.update(timePassed)

        if (snakeMoveTimer.timeIsUp()) {
            snake.move()
            val head = snake.head

            if (head.x < 1) {
                head.x = WORLD_WIDTH
            }

            if (head.x > WORLD_WIDTH) {
                head.x = 1
            }

            if (head.y < 1) {
                head.y = WORLD_HEIGHT
            }

            if (head.y > WORLD_HEIGHT) {
                head.y = 1
            }

            if (head.x == apple.x && head.y == apple.y) {
                val body = snake.body
                val lastPart = body[body.size - 1]
                body.add(SnakeBodyPart(lastPart.x, lastPart.y))
                placeApple()
            }

            snakeMoveTimer.reset()
        }
    }

    override fun draw(graphics: Graphics2D) {
        graphics.apply {
            color = Color.black
            fillRect(0, 0, game.width, game.height)
            drawSnake(this)
            drawApple(this)
        }
    }

    private fun processInput() {
        for (event in game.input.consumeEvents()) {
            when (event) {
                is Input.Event.KeyPressed -> {
                    when (event.data.keyCode) {
                        KeyEvent.VK_UP -> snake.direction = Direction.UP
                        KeyEvent.VK_RIGHT -> snake.direction = Direction.RIGHT
                        KeyEvent.VK_DOWN -> snake.direction = Direction.DOWN
                        KeyEvent.VK_LEFT -> snake.direction = Direction.LEFT
                    }
                }
            }
        }
    }

    private fun drawSnake(graphics: Graphics2D) {
        graphics.apply {
            color = Color.green

            snake.body.forEach { part ->
                fillRect(
                    part.x * CELL_SIZE - CELL_SIZE,
                    game.screenSize.height - part.y * CELL_SIZE,
                    CELL_SIZE,
                    CELL_SIZE
                )
            }
        }
    }

    private fun drawApple(graphics: Graphics2D) {
        graphics.apply {
            color = Color.red

            fillRect(
                apple.x * CELL_SIZE - CELL_SIZE,
                game.screenSize.height - apple.y * CELL_SIZE,
                CELL_SIZE,
                CELL_SIZE
            )
        }
    }

    private fun placeApple() {
        var x = (1 + (Math.random() * WORLD_WIDTH)).toInt()
        var y = (1 + (Math.random() * WORLD_HEIGHT)).toInt()

        while (!isCellEmpty(x, y)) {
            if (x < WORLD_WIDTH) {
                x++
            } else {
                if (y < WORLD_HEIGHT) {
                    x = 1
                    y++
                } else {
                    x = 1
                    y = 1
                }
            }
        }

        apple = Apple(x, y)
    }

    private fun isCellEmpty(x: Int, y: Int) = snake.body.none { it.x == x && it.y == y }

    private fun gameIsOver(): Boolean {
        if (snake.body.size == WORLD_WIDTH * WORLD_HEIGHT) {
            return true
        }

        snake.body.forEachIndexed { index, part ->
            if (index > 0 && part.x == snake.head.x && part.y == snake.head.y) {
                return true
            }
        }

        return false
    }

    companion object {
        const val WORLD_WIDTH = 12
        const val WORLD_HEIGHT = 12
        const val CELL_SIZE = 55
    }
}
Let’s go through this code line by line to better understand what’s happening:
private val snake = Snake(
    startX = WORLD_WIDTH / 2,
    startY = WORLD_HEIGHT / 2
)

private lateinit var apple: Apple

private val snakeMoveTimer = Timer(TimeUnit.MILLISECONDS.toNanos(300))

init {
    placeApple()
}
Here we are just instantiating our snake and apple and setting up snake move timer to make sure it won’t run too fast.
override fun update(timePassed: Long, timeUnits: TimeUnit) {
    if (gameIsOver()) {
        // game.scene = GameOverScene(game) TODO Implement later
        return
    }

    processInput()

    snakeMoveTimer.update(timePassed)

    if (snakeMoveTimer.timeIsUp()) {
        snake.move()
        val head = snake.head

        if (head.x < 1) {
            head.x = WORLD_WIDTH
        }

        if (head.x > WORLD_WIDTH) {
            head.x = 1
        }

        if (head.y < 1) {
            head.y = WORLD_HEIGHT
        }

        if (head.y > WORLD_HEIGHT) {
            head.y = 1
        }

        if (head.x == apple.x && head.y == apple.y) {
            val body = snake.body
            val lastPart = body[body.size - 1]
            body.add(SnakeBodyPart(lastPart.x, lastPart.y))
            placeApple()
        }

        snakeMoveTimer.reset()
    }
}
This part is more interesting. The first thing we need to do on each update is to make sure the game is still playable. If the game is over (snake ate itself), we need to transition to the GameOver scene which will be implemented in the next post.
The next step is to process the user input. After that, we need to update the snake move timer and check if it’s time to move the snake. In case we need to move the snake, we should also check that it stays inside the screen bounds. That’s why we need those 4 head position checks.
We should also check if the snake has reached an apple. In that case we need to place another apple somewhere on the game screen and we should also elongate the snake length.
Let’s move to the next method:
override fun draw(graphics: Graphics2D) {
    graphics.apply {
        color = Color.black
        fillRect(0, 0, game.width, game.height)
        drawSnake(this)
        drawApple(this)
    }
}
Nothing interesting here, we’re just filling the screen with black color and then drawing the snake and apple. Let’s move forward:
private fun processInput() {
    for (event in game.input.consumeEvents()) {
        when (event) {
            is Input.Event.KeyPressed -> {
                when (event.data.keyCode) {
                    KeyEvent.VK_UP -> snake.direction = Direction.UP
                    KeyEvent.VK_RIGHT -> snake.direction = Direction.RIGHT
                    KeyEvent.VK_DOWN -> snake.direction = Direction.DOWN
                    KeyEvent.VK_LEFT -> snake.direction = Direction.LEFT
                }
            }
        }
    }
}
Here we are analyzing the pressed keys and setting the snake direction according to user input.
private fun drawSnake(graphics: Graphics2D) {
    graphics.apply {
        color = Color.red

        snake.body.forEach { part ->
            fillRect(
                part.x * CELL_SIZE - CELL_SIZE,
                game.screenSize.height - part.y * CELL_SIZE,
                CELL_SIZE,
                CELL_SIZE
            )
        }
    }
}

private fun drawApple(graphics: Graphics2D) {
    graphics.apply {
        color = Color.green

        fillRect(
            apple.x * CELL_SIZE - CELL_SIZE,
            game.screenSize.height - apple.y * CELL_SIZE,
            CELL_SIZE,
            CELL_SIZE
        )
    }
}
Those methods are used to draw the game objects. As you can see we can just fill the rectangles with different colors to make a distinction between snake body and apples: snake body is green but apples are red.
private fun placeApple() {
    var x = (1 + (Math.random() * WORLD_WIDTH)).toInt()
    var y = (1 + (Math.random() * WORLD_HEIGHT)).toInt()

    while (!isCellEmpty(x, y)) {
        if (x < WORLD_WIDTH) {
            x++
        } else {
            if (y < WORLD_HEIGHT) {
                x = 1
                y++
            } else {
                x = 1
                y = 1
            }
        }
    }

    apple = Apple(x, y)
}

private fun isCellEmpty(x: Int, y: Int) = snake.body.none { it.x == x && it.y == y }
This block can be a bit harder to understand. Basically, we need to find an empty cell to place a new apple here but the location cannot be predictable, so we should start with a random point. If that point is empty - that’s it, but if it’s not we need to scan our game grid line by line in order to find an empty cell. In that case we should use the first empty cell we find while scanning.
private fun gameIsOver(): Boolean {
    if (snake.body.size == WORLD_WIDTH * WORLD_HEIGHT) {
        return true
    }

    snake.body.forEachIndexed { index, part ->
        if (index > 0 && part.x == snake.head.x && part.y == snake.head.y) {
            return true
        }
    }

    return false
}
What is a game over state? There are 2 possible outcomes:
- winning (snake took all the space)
- losing (snake tried to eat itself)
That’s exactly what we are checking for.
Running The Game
Let’s run our game and try to play it. You should see the following picture:
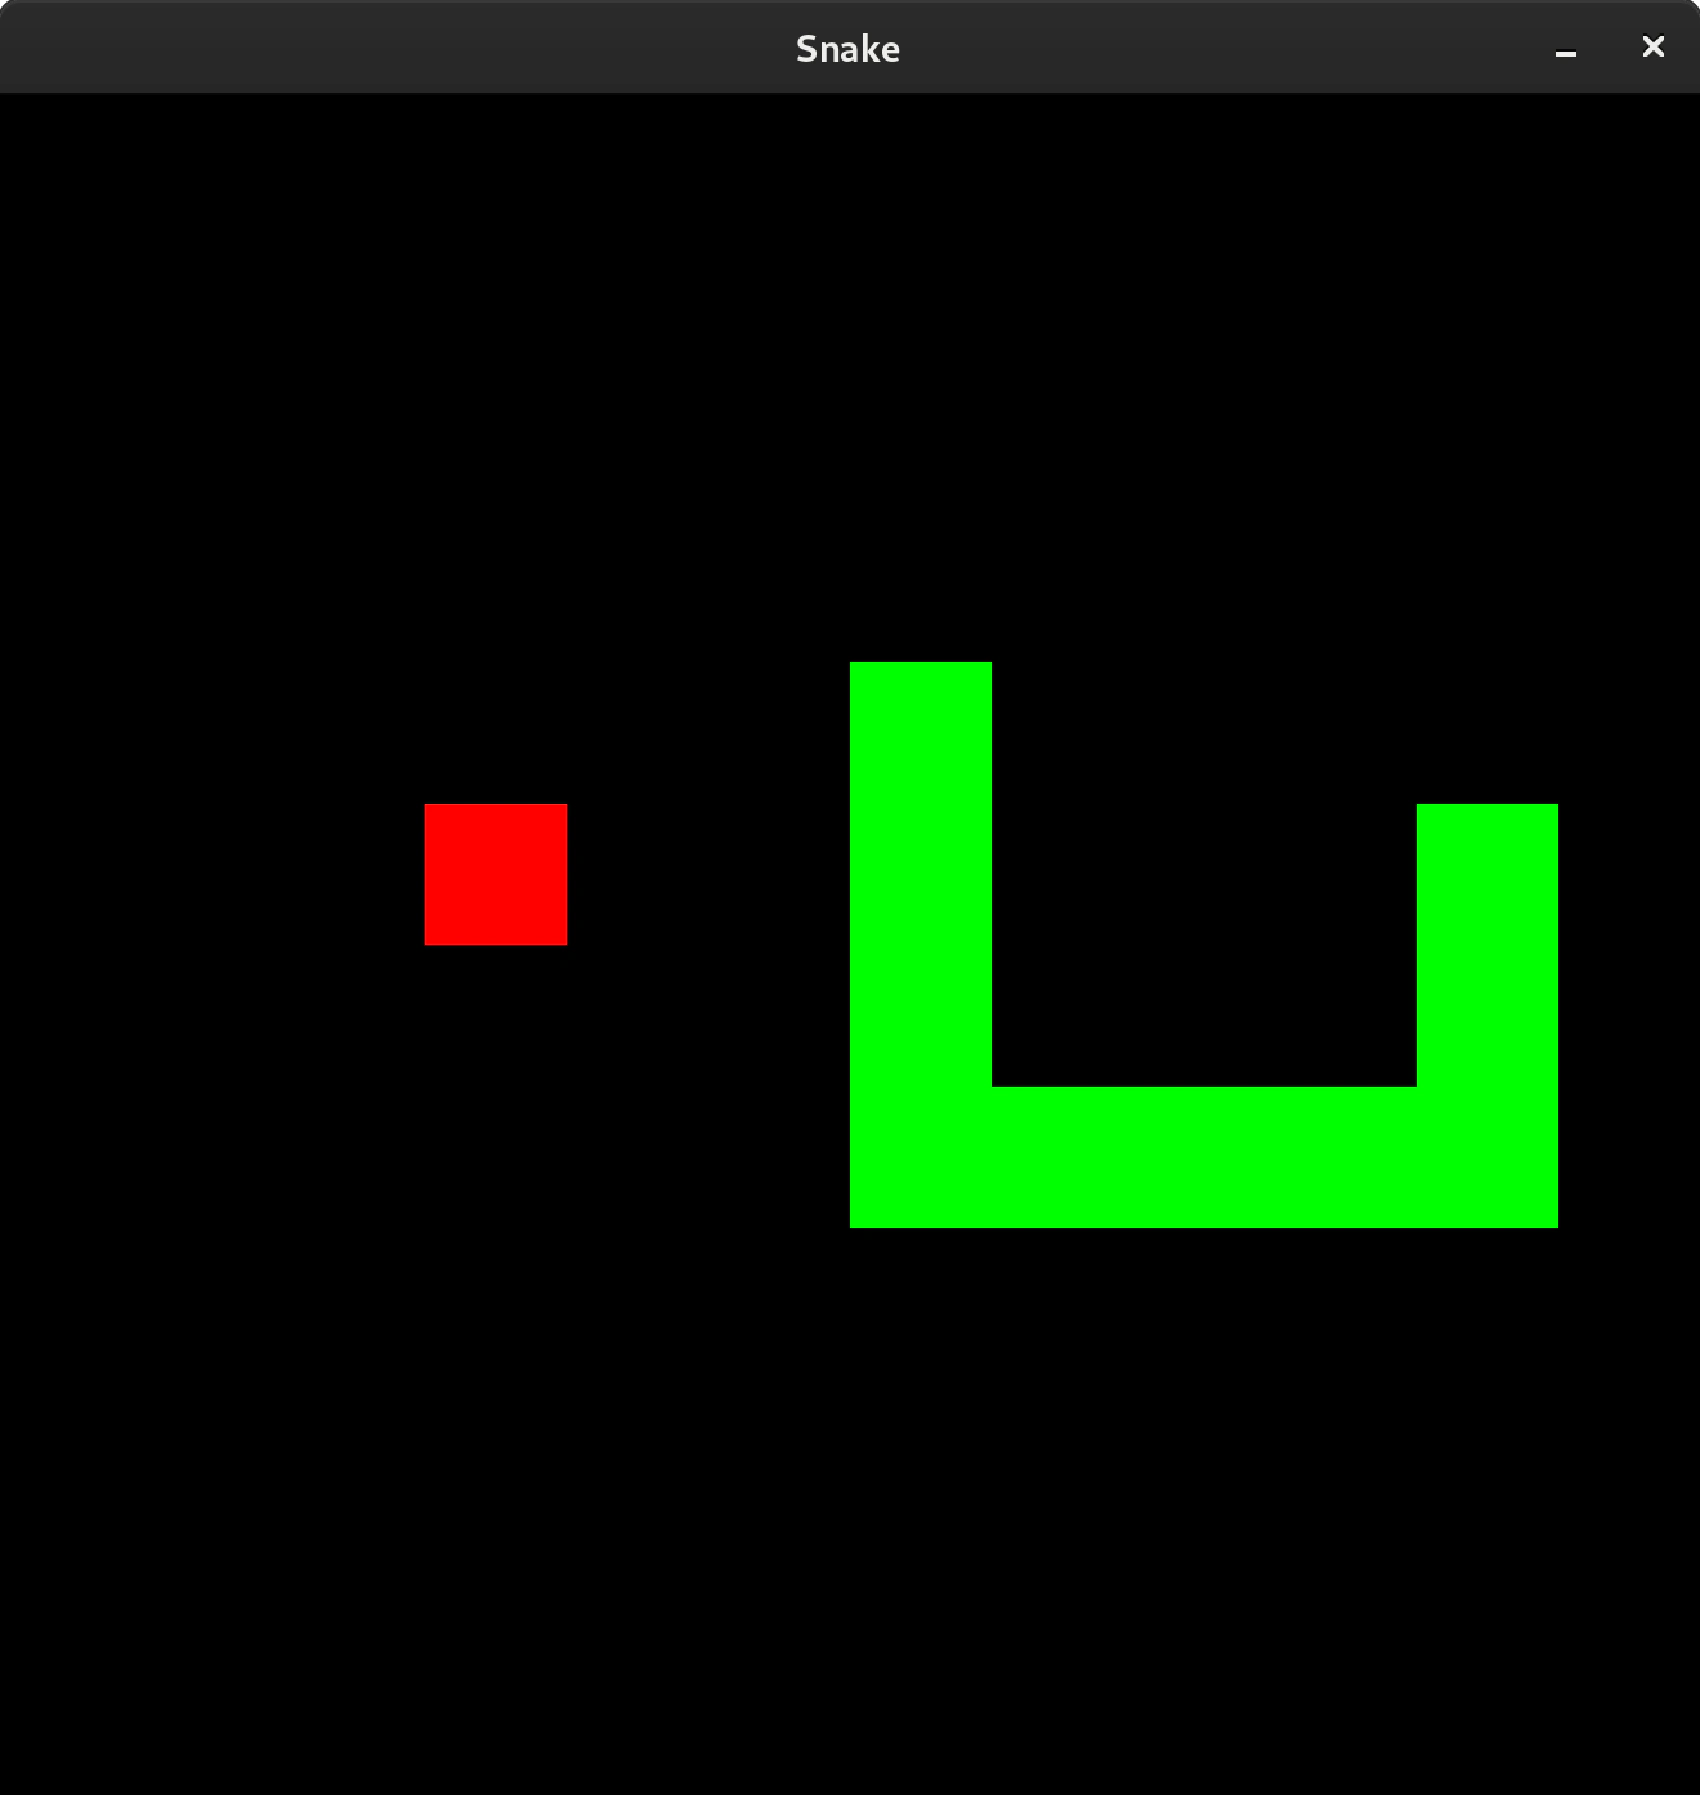
Don’t forget to uncomment screen transition on the MainMenuScene.
Conclusion
Our game is almost ready, we just need to add the “game over” scene and reflect on the things that we’ve implemented so far.
Finalizing The Game
Game Over Scene
Our game needs one more scene in order to be completed: GameOverScene, let’s add it to our project:
import java.awt.Color
import java.awt.Font
import java.awt.Font.BOLD
import java.awt.Graphics2D
import java.awt.event.KeyEvent
import java.util.concurrent.TimeUnit

class GameOverScene(game: Game) : Scene(game) {

    override fun update(timePassed: Long, timeUnits: TimeUnit) {
        game.input.consumeEvents().forEach {
            when (it) {
                is Input.Event.KeyPressed -> {
                    when (it.data.keyCode) {
                        KeyEvent.VK_ENTER -> game.scene = GameScene(game)
                    }
                }
            }
        }
    }

    override fun draw(graphics: Graphics2D) {
        graphics.apply {
            color = Color.black
            fillRect(0, 0, game.screenSize.width, game.screenSize.height)

            font = Font("Default", BOLD, 16)
            color = Color.white

            val message = "Press <Enter> to start new game"
            val messageBounds = fontMetrics.getStringBounds(message, this)
            val messageWidth = messageBounds.width.toInt()
            val messageHeight = messageBounds.height.toInt()

            drawString(
                message,
                game.screenSize.width / 2 - messageWidth / 2,
                game.screenSize.height / 2 - messageHeight / 2
            )
        }
    }
}
There are 2 major steps happening here:
- Scanning the user input
- Drawing hint text in the center of our new scene
Let’s go through those steps one by one:
override fun update(nanosecondsPassed: Long) {
    game.input.consumeEvents().forEach {
        when (it) {
            is Input.Event.KeyPressed -> {
                when (it.data.keyCode) {
                    KeyEvent.VK_ENTER -> game.scene = GameScene(game)
                }
            }
        }
    }
}
This step is pretty straightforward, we need to scan through all of the input events in order to find out if the ENTER key was pressed. Pressing the ENTER key means we should navigate to the GameScene and restart our game.
Let’s move to the next step:
override fun draw(graphics: Graphics2D) {
    graphics.apply {
        color = Color.black
        fillRect(0, 0, game.screenSize.width, game.screenSize.height)

        font = Font("Default", BOLD, 16)
        color = Color.white

        val message = "Press <Enter> to start new game"
        val messageBounds = fontMetrics.getStringBounds(message, this)
        val messageWidth = messageBounds.width.toInt()
        val messageHeight = messageBounds.height.toInt()

        drawString(
            message,
            game.screenSize.width / 2 - messageWidth / 2,
            game.screenSize.height / 2 - messageHeight / 2
        )
    }
}
The first 2 lines are responsible for filling the screen in black. The next two lines are just initializing the font that we want to use for drawing the text and the rest of the code is responsible for actually drawing it. Luckily for us, the Java SDK provides us with the getStringBounds method which can predict the size of the text that we’re going to draw. Using those metrics, we can place our text at the center of the screen:
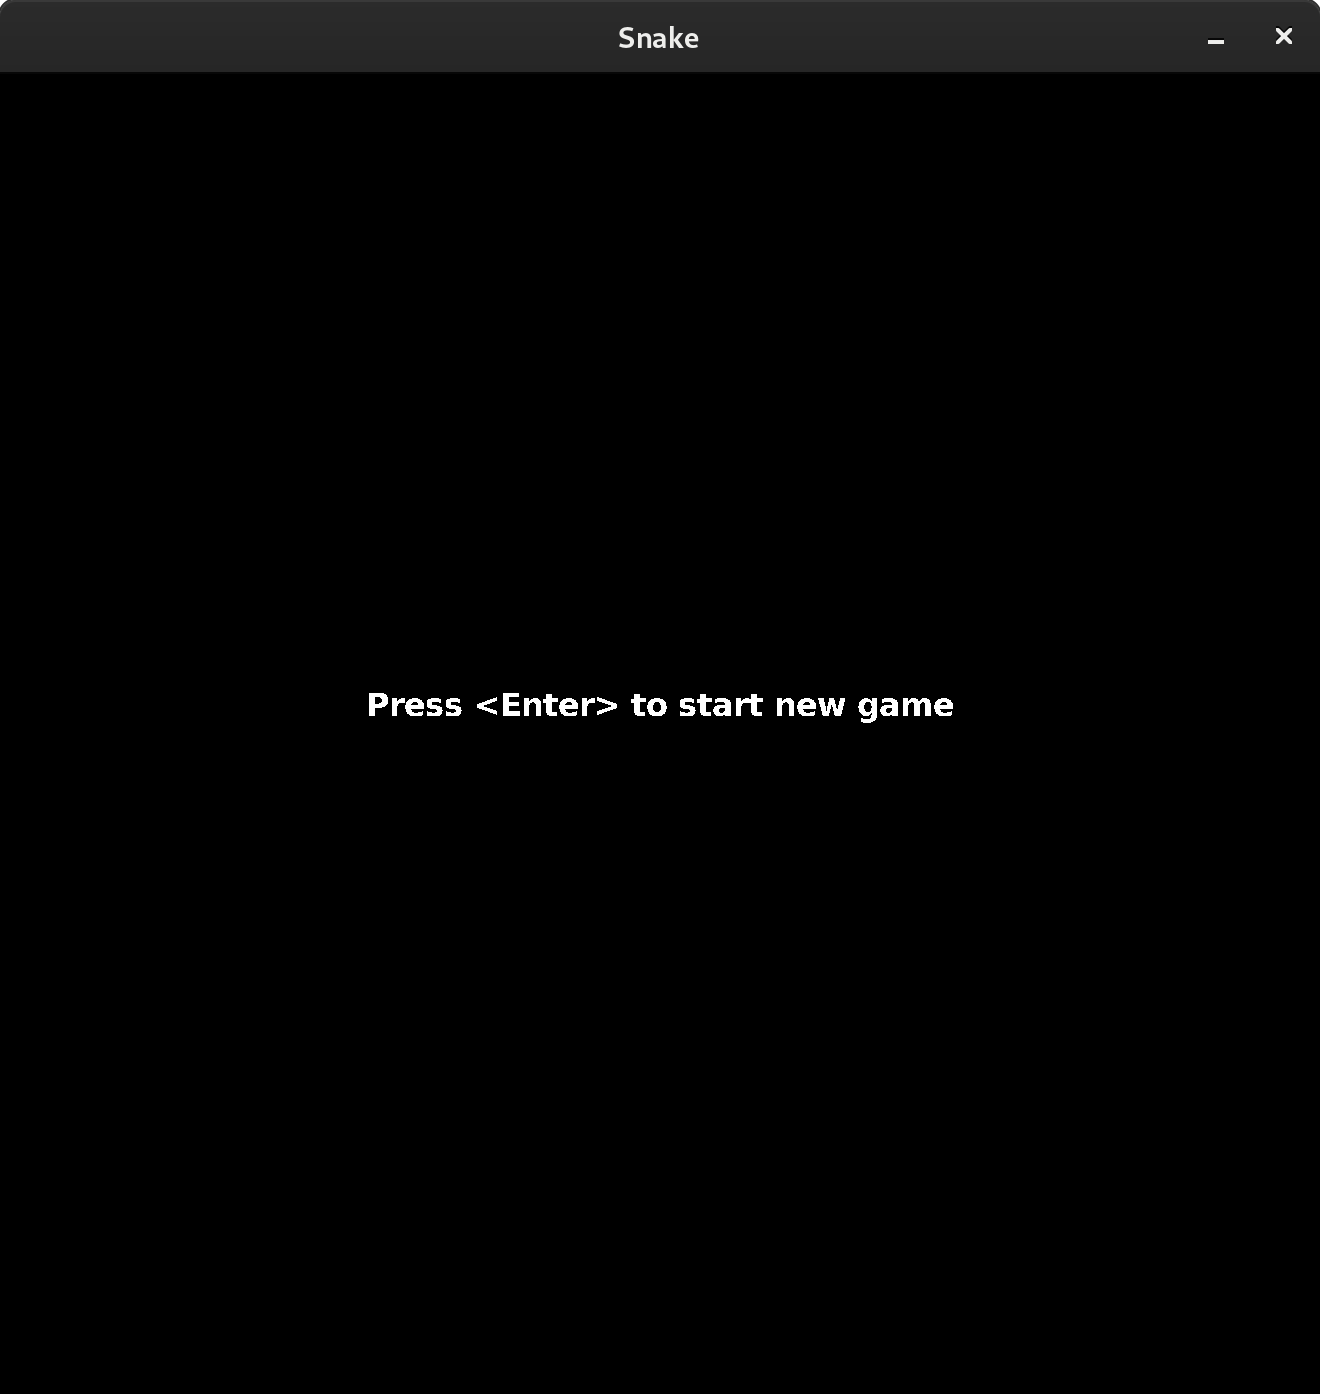
Conclusion
In this series we’ve covered the basics of game development in Kotlin, and we’ve also created a fully playable snake game.
There are far more in the game development than just that. Here is the steps that I recommend if you want to go further (the order is irrelevant):
-
Learn how to create graphics (raster, vector, 3D objects rendered to 2D images, doesn’t matter).
-
Learn how to create and add sound effects and music to your game.
-
Learn a game engine, the best choice depends on your experience in programming. I’d recommend Game Maker for total noobs, LibGDX for people who have solid programming skills and something like Unity if you want to sell your game or pursue a career in game development.
-
Copy a few successful games with simple mechanics. It can teach you a lot about the art of making games.
-
Don’t be too hard on yourself. There are tons of things to learn, but it is worth it only if you enjoy the process!