A full guide on how to get, customize and install the latest Raspbian distro on a Rappberry Pi 4.

Table of Contents
Preface
This article contains a list of steps and notes on installing Raspbian Lite on an SD card. I often document some tasks for future reference and I’ve just got five more Raspberry Pi’s for my new project, which means that installing Raspbian Lite might be a thing I’ll need to repeat from time to time.
Step 1: Downloading Raspbian Lite
Raspbian Lite can be downloaded from the official website: https://www.raspberrypi.org/downloads/raspbian/
You can also do that from a command line:
wget --trust-server-names \
  https://downloads.raspberrypi.org/raspbian_lite_latest
The official website offers two download options: direct link and torrent link. I tried direct link first, and it gave me about 200 kB/s, which is quite slow even for my modest 100 Mbit/s connection. Torrent option boosted the download speed to about 5 MB/s which is far more pleasant.
Direct download speed: 200,000 B/s
Bandwidth: 10,125,000 B/s
Bandwidth Utilization: 1.98%
Torrent download speed: 5,000,000 B/s
Bandwidth: 10,125,000 B/s
Bandwidth Utilization: 49.38%
Here is the torrent link:
https://downloads.raspberrypi.org/raspbian_lite_latest.torrent
Raspbian ships in heavily compressed form, so we need to unzip the downloaded file in order to get an actual Raspbian image that can be used to install Raspbial Lite on SD cards.
unzip 2019-09-26-raspbian-buster-lite.zip
ls -lh
2.1G 2019-09-26-raspbian-buster-lite.img
434M 2019-09-26-raspbian-buster-lite.zip
Compressing this image adds one little step to our setup process, but it also means five times less load on Raspberry Pi foundation webservers so it’s not hard to guess why they compress Raspbian images before distributing them.
Step 2: Writing Raspbian Lite Image on SD Card
First, you have to find the device name of your SD card. I have an internal card reader in my laptop, so it always appears at /dev/mmcblk0 but it can be different if you use an external card reader. You should also make sure that the SD card is unmounted (umount it, if necessary).
sudo dd status=progress \
  if=2019-09-26-raspbian-buster-lite.img \
  of=/dev/mmcblk0
Be patient, it can take a while. That’s why it’s good to use status=progress, we can see the progress and be assured that dd did not just hang and stuck in inactive state. Tweaking block size can speed things up quite a bit, but it may break progress reporting.
289411584 bytes (289 MB, 276 MiB) copied, 50 s, 5.8 MB/s ...
Finally, we should see something like that:
2247615488 bytes (2.2 GB, 2.1 GiB) copied, 396 s, 5.7 MB/s
4390912+0 records in
4390912+0 records out
2248146944 bytes (2.2 GB, 2.1 GiB) copied, 400.327 s, 5.6 MB/s
That should be it. Let’s check what do we have now on that SD card:
lsblk --fs
NAME         FSTYPE  LABEL   UUID  FSAVAIL  FSUSE%  MOUNTPOINT
mmcblk0
├─mmcblk0p1  vfat    boot    xxx   200.3M   21%     /media/user/boot
└─mmcblk0p2  ext4    rootfs  xxx   633.1M   59%     /media/user/rootfs
It looks like we need two partitions: first one is used by Raspberry Pi to boot up and the second one hosts the operating system and all the data owned by its users.
sudo fdisk -l
Disk /dev/mmcblk0: 29.7 GiB, 31914983424 bytes, 62333952 sectors
Units: sectors of 1 * 512 = 512 bytes
Sector size (logical/physical): 512 bytes / 512 bytes
I/O size (minimum/optimal): 512 bytes / 512 bytes
Disklabel type: dos
Disk identifier: 0x00000000

Device         Boot  Start     End Sectors  Size Id Type
/dev/mmcblk0p1        8192  532479  524288  256M  c W95 FAT32 (LBA)
/dev/mmcblk0p2      532480 4390911 3858432  1.9G 83 Linux
Note that those partitions do not take up all the free space on the SD card. The second partition will be expanded automatically once you boot up your Raspberry Pi.
df -h
Filesystem      Size  Used  Avail  Use%  Mounted on
/dev/mmcblk0p1  253M  52M   201M   21%   /media/user/boot
/dev/mmcblk0p2  1.8G  1.1G  634M   64%   /media/user/rootfs
Step 3 Making Customized Image (Optional)
The official image knows nothing about your Wi-Fi and it also blocks SSH access by default, for security reasons. That’s a pain in the ass, especially if you have a few Pi boards. Making your own custom Raspbian images with all of those settings baked in can simplify setting up new machines or giving a fresh start to the existing ones. Another benefit of having your own image is that you wouldn’t need a monitor to log in to your Raspberry Pi for the first time, it can be done via SSH.
First, let’s set up Wi-Fi (change /media/user/ to your actual mount path):
sudo nano /media/user/boot/wpa_supplicant.conf
ctrl_interface=DIR=/var/run/wpa_supplicant GROUP=netdev
update_config=1
country=TH # put your country code here

network={
        ssid="wifi_name"
        psk="wifi_password"
}
Don’t forget to change the country code and WiFi auth credentials. Now, it’s time to enable SSH access:
touch /media/user/boot/ssh
And the last step is to clone our customized Raspbian to a separate img file for later use. We don’t want to clone the whole SD card, just the part with the actual data, so:
sudo fdisk -l
This tool can show us a lot of useful info about all of the block storage devices. We’re interested in sector size and end sector in particular.
Disk /dev/mmcblk0: 29.7 GiB, 31914983424 bytes, 62333952 sectors
Units: sectors of 1 * 512 = 512 bytes
Sector size (logical/physical): 512 bytes / 512 bytes
I/O size (minimum/optimal): 512 bytes / 512 bytes
Disklabel type: dos
Disk identifier: xxx

Device         Boot  Start     End Sectors  Size Id Type
/dev/mmcblk0p1        8192  532479  524288  256M  c W95 FAT32 (LBA)
/dev/mmcblk0p2      532480 4390911 3858432  1.9G 83 Linux
Sector size: 512 bytes
End sector: 4390911
4390911 * 512 = 2248146432 bytes or ~2.25 GB
Looks legit. Check your output and put your own numbers, if necessary. So, let’s create our custom image:
sudo dd status=progress bs=512 count=4390911 \
  if=/dev/mmcblk0 \
  of=2019-09-26-raspbian-buster-lite-custom.img
ls -lah
2.1G  2019-09-26-raspbian-buster-lite-custom.img
2.1G  2019-09-26-raspbian-buster-lite.img
434M  2019-09-26-raspbian-buster-lite.zip
Now we have our own image which knows your Wi-Fi and allowed SSH connections. No need to use wires and monitor in order to start using your Raspberry Pi. Let’s connect to it:
ssh pi@raspberrypi
Don’t forget to change your password, default is “raspberry”. That’s the reason why SSH is disabled by default, it’s better to change that password as soon as possible.
Step 4: First Run on a Raspberry Pi
Plug your SD card into Raspberry Pi board and fire it up. The default log in credentials are:
User: pi
Password: raspberry
The first thing you may want to look at is the raspi-config utility. You can find more information here: https://www.raspberrypi.org/documentation/configuration/raspi-config.md
raspi-config
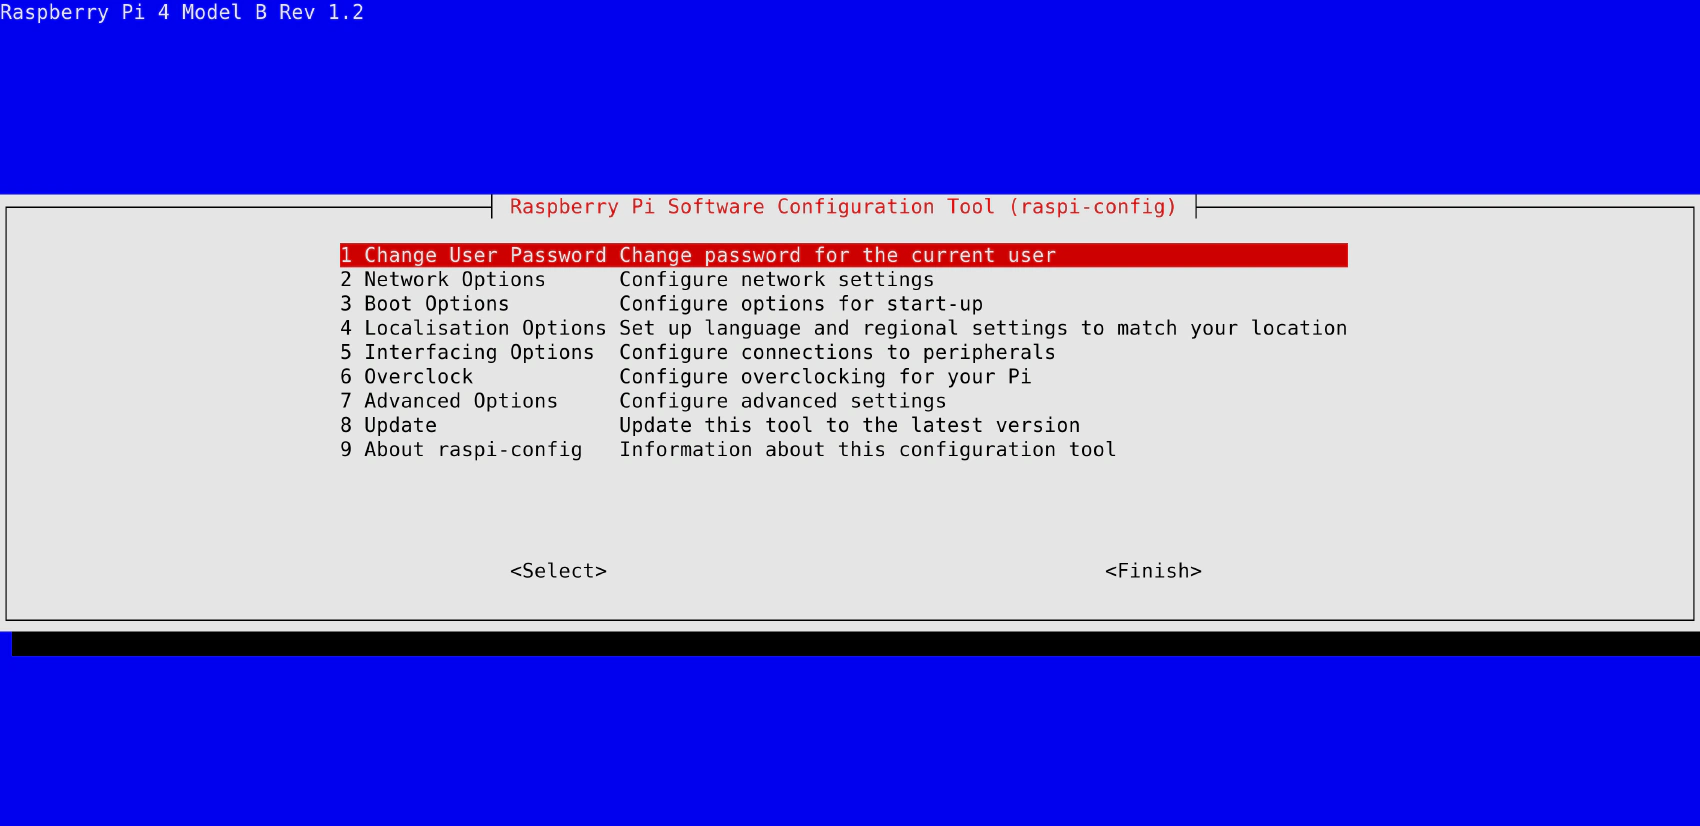
This program will help you to change your password, host name, enable Wi-Fi and SSH, and do many other things you may find necessary in order to fully utilize your Raspberry Pi.
Let’s see how our partitions look now:
lsblk --fs
NAME         FSTYPE  LABEL   UUID  FSAVAIL  FSUSE%  MOUNTPOINT
mmcblk0
├─mmcblk0p1  vfat    boot    xxx   199.6M   21%     /media/user/boot
└─mmcblk0p2  ext4    rootfs  xxx   26.6G    4%      /media/user/rootfs
sudo fdisk -l
Disk /dev/mmcblk0: 29.7 GiB, 31914983424 bytes, 62333952 sectors
Units: sectors of 1 * 512 = 512 bytes
Sector size (logical/physical): 512 bytes / 512 bytes
I/O size (minimum/optimal): 512 bytes / 512 bytes
Disklabel type: dos
Disk identifier: xxx

Device           Start       End   Sectors   Size  Id  Type
/dev/mmcblk0p1    8192    532479    524288   256M   c  W95 FAT32 (LBA)
/dev/mmcblk0p2  532480  62333951  61801472  29.5G  83  Linux
df -h
Filesystem                Size  Used Avail Use% Mounted on
/dev/mmcblk0p1            253M   53M  200M  21% /media/user/boot
/dev/mmcblk0p2             29G  1.3G   27G   5% /media/user/rootfs
All fine, I guess we’re done here.
Step 5: Updating Software
Outdated software is a security threat, and you can also miss on new features and performance optimizations if you don’t keep your OS up do date. First, let’s check for new software updates:
sudo apt update
Reading package lists... Done
Building dependency tree
Reading state information... Done
64 packages can be upgraded. Run 'apt list --upgradable' to see them.
Looks like our Raspbian needs some updating, let’s do it:
sudo apt upgrade
One of the distinctive features of Raspberry Pi 4 is an SPI-attached EEPROM module. It supposed to update automatically if there are critical updates that need to be installed, but it’s a good idea to check if you’re up do date:
sudo rpi-eeprom-update
EEPROM updates can greatly improve Raspberry Pi 4 performance and add some handy features so keep an eye on them. Personally, I’m waiting for USB boot feature, and it will be rolled out with one of the future EEPROM updates.
Conclusion
Raspbian Lite is a great system for running a server on a Raspberry Pi 4. It’s officially supported, and it also has some unique features that are critical in order to make sure that you fully utilize your Raspberry Pi (primarily rpi-eeprom-update). Raspbian Lite is pretty compact and easy to install and the steps above provide some details on how the installation process might look like.